Medications may be administered for MedPass under the Home
Page or the MedPass tab. On the Home Page, Patients are
shown in alphabetical order or room order (this can be
customized at the facility level), according to how much time
is left in the Medication Administration Time Window of one
hour before and one hour after the prescribed administration
time for a particular medication. The amount of time
remaining in the Medication Administration Time Window is
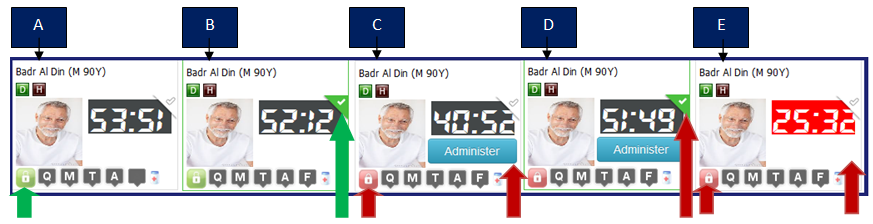
indicated by the Admin Timer.

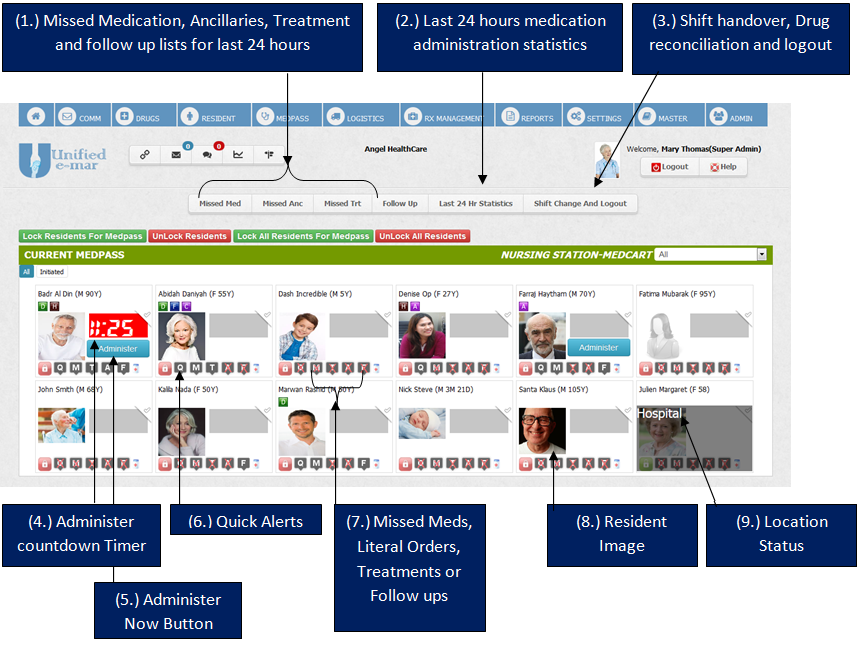
As you can see Patient 1 and 2 have 7 minutes left
in their Admin Time Bars where as Patient 3 has 67 minutes.
They are then alphabetized according to First name.
Facilities that choose to have Patients listed in room order
by Admin Time Bar will have the Patients listed according to
how much time is remaining on their Admin Time Bar, and
secondarily, in room order. The next Patient listed would be
the one chronologically, that needs medications administered.
Patient with no scheduled medications in the 2 hour window
but PRNs will be arranged next. Then Patient with no
scheduled medications nor PRN but in facility will be
arranged next. Then the Patient out of facility (ie, not
available for Medpass) will be placed last.
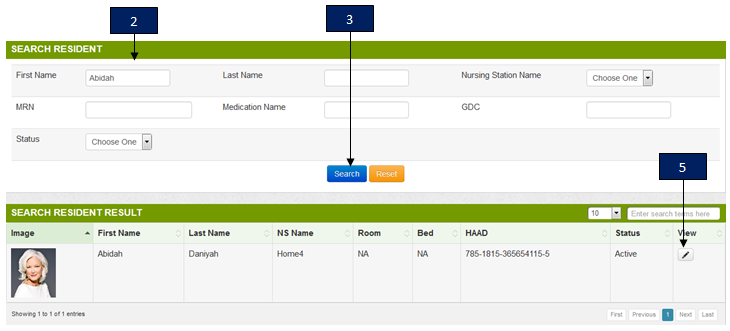
To begin MedPass, you must first choose to perform which
Patient you are going for Medpass.

If you are assigned to a medcart, you will only see
Patients in that medcart. If you are super admin or DON or
Admin, you can select any medcart. Before administering the
Patient, you will have to lock that Patient. Once you
locked the Patient, no other users will be able to lock it
until you or super admin unlock the Patient. If a Patient
is not locked, you will see a green lock as shown by 6. There
won't be administering button. For locking a Patient, select
the check mark shown in 5. Now click on the button indicated
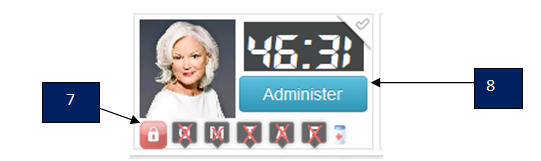
by 1. Page refreshes and now 6 turns to red (see 7) and you
can see ADMINSITER button(8)
 1. Lock Patient for Medpass button-
 If you
want to administer a Patient you will have to lock the
Patient Select the Patient and click the lock button .
Locking and unlocking process is explained below.
2. Unlock Patient for Medpass button- If you have finished
your task or your shift is finished, you have to unlock the
Patient. Select the Patient and click the unlock button.
3. Lock all Patients for Medpass button- If you want
to lock all Patients, click this button.
4.
Unlock all Patients for Medpass button- If you want to
unlock all Patients, click this button.
5.
Lock Check-click to select the Patient. You can check
multiple Patients at a time.
6. Lock Status
Green- If the Patient is not locked you will see a green
lock. You can click this lock to lock the Patient.
7. Lock Status Red- If the Patient is locked you will see a
red lock. You can click this lock to unlock the Patient.
8. Administer - To perform Medpass, simply click on
the Administer button. That will take you directly to the
Patient's medication page due to be given at that time. The
first screen displays the Patient information. You can
navigate for administration on other tabs.
9.
Initiated- Initiated button will display all Patients whose
mediations are initiated and not reported.
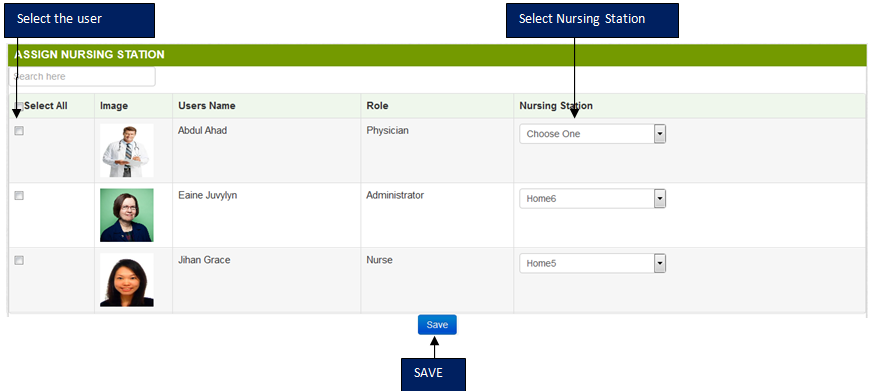
10. Select Nursing Station-Medcart- If you are an admin or
DON you can select the Nursing station from the dropdown and
see which al Patients there. If you are assigned to a
particular nursing station, you cannot view Patients in
another nursing station.
11. Patient
Information box- Each box explains some information about
the Patient. Please see the section below.
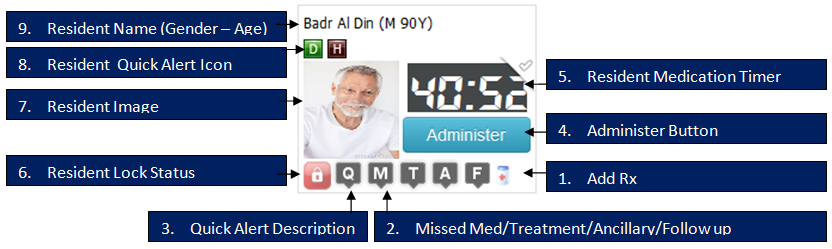
PATIENT
INFORMATION BOX 1. Patient Name- The top
most line shows the Patient First Name and Last Name. In the
bracket it displays Gender and Age. If male it show M and for
female F. Age will be displayed as like this
a. If age
Less than 1 months-Displays days. Eg: 2D means 2 days
b. If age Less than 1 year -Displays months and days. Eg: 3M
2D means 3 months 2 days
c. If age Less than 5
years-Displays days. Eg: 6Y means 6 Years
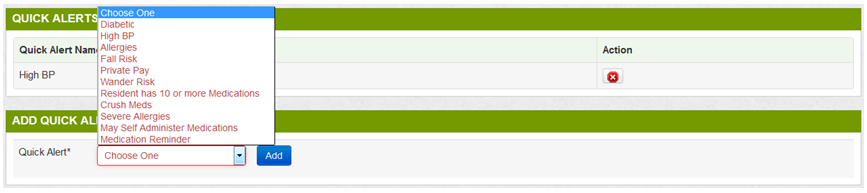
2.
Quick Alert Icon- Each quick alert icon is added to Patient
from the Patient profile. If mouseover it explains what
quick alert it is.
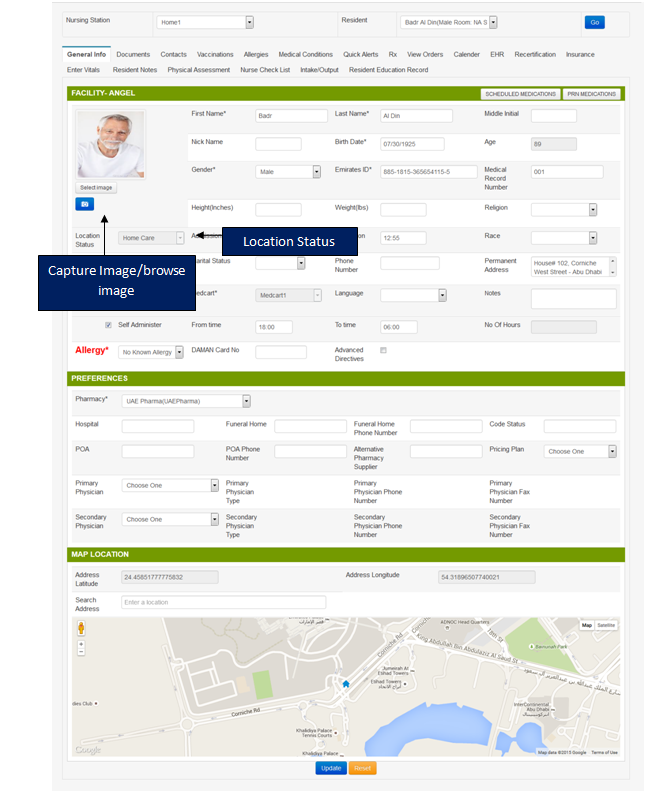
3. Patient Image- The
image displays the Patient's image uploaded. IF not uploaded
a default image based on gender will be displayed.
4. Lock Status- If the lock icon is red; it means the
patient is locked. If green, it indicates the patient is not
locked.
5. Medication Timer-If any scheduled
medication or treatment or ancillary is to be given within
two hours, the timer will start countdown from 120 mins. The
background will be grey until it hits last 30 mins. Then the
background turns to red.
6. Administer
button-If the Patient is locked by you, then the administer
button will be active if:
a. Any scheduled medication
within two hours
b. Or any PRNs
c. Or both a
and b above.
7. Quick Alert Icon-This will be
active if any quick alert for the Patient. Once you click,
it will pop up a window that explains the quick alerts.
8. Missed Med/Treatment/Ancillary/Follow up icon- If
any medication or treatment or ancillary is missed for the
Patient the buttons will be active. Otherwise it will be
crossed. If any follow up then, F icon will start to blink.
9. Add Rx- Short cut to add prescription


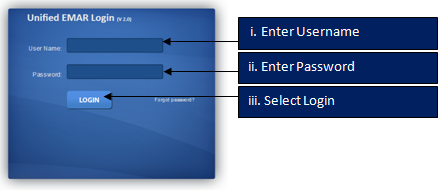
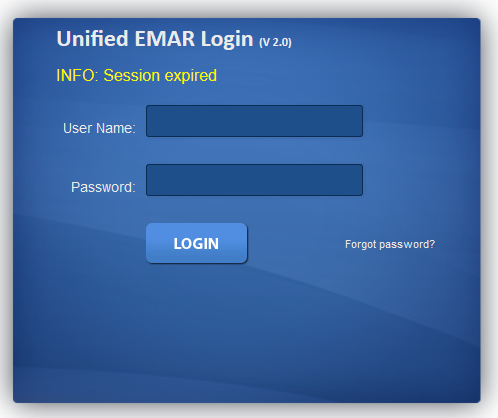
 Training Manual PDF
 or
Chrome
or
Chrome  and
in the URL address line, enter https://ae.unifiedemar.com:8443/unifiedemarapp/
and
in the URL address line, enter https://ae.unifiedemar.com:8443/unifiedemarapp/


 .
Once locked, page refreshes and this icon changes to red
.
Once locked, page refreshes and this icon changes to red  .
. button.
 button.
 button.